
What is the issue with images?
The problem with images is that if you try to zoom in, the quality starts to be really bad (ugly pixels) without even talking about the size of it.
The best way to display nice icons in your app or website is to use Font Icons. Like that you will have only one file containing all your icons.
How do you create your own font?
Many free and open-source projects can help you to do that. And I can assure you, you will always be able to find an icon that matches your needs.
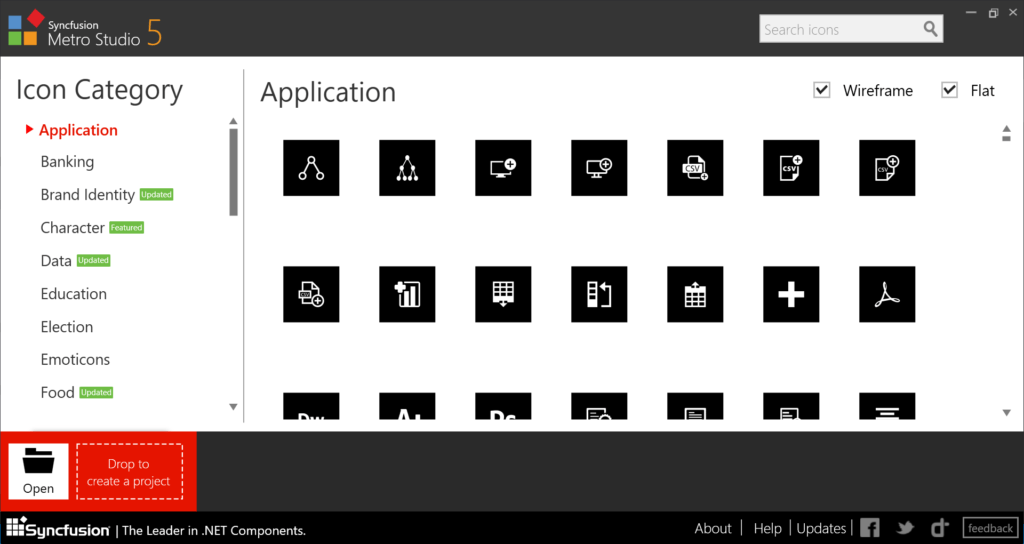
There is a nice application which is totally free to use (for now): Metro Studio from SyncFusion. With this app you can select the icons you want and then generate a font. Easy and smart. The downside is that you still have to create an account and with SyncFusion, you get used to the free stuff and they become paid for at one point… Plus, at the time of writing this post, there is a bug in the generation of the font which includes a shift in position.
Material Design from Google is obviously a massive reference source containing thousands of free icons, downloadable as SVG or PNG with different sizes.

But for me the best of the best I found was Fontello which is a website providing access to some open-source fonts like FontAwesome. You can also generate your own font based on your icon selection.

In my case, I needed some icons for a Xamarin.Forms app and I didn’t want to have a lot of files representing my icons. One file containing everything is a must, especially when this file is a TTF containing vector images, where you don’t really care about the color or the size, it’s a font…
How do you use the font in Xamarin.Forms?
So let’s do it! Go to Fontello.com, select some sexy icons, and download your custom font. Now, in your Xamarin.Forms app (or UWP), include the font as an Embedded Resource (I’ve created a “Resources” folder in the share project and dropped my font in there).
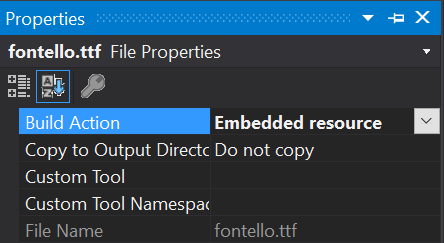
You can open the AssemblyInfo file from your shared project and add a reference to your font with an Alias.
using Xamarin.Forms;
using Xamarin.Forms.Xaml;

[assembly: XamlCompilation(XamlCompilationOptions.Compile)]
[assembly: ExportFont("fontello.ttf", Alias = "MyAlias")]
Code language: C# (cs)
Now, in the App.xaml file, just under the <Application>, add this mapping:
<Application.Resources>
<x:String x:Key="SettingsIcon"></x:String>
<x:String x:Key="InfoIcon"></x:String>
<x:String x:Key="ChronoIcon"></x:String>
<x:String x:Key="PlayIcon"></x:String>
<x:String x:Key="StopIcon"></x:String>
<x:String x:Key="PauseIcon"></x:String>
<x:String x:Key="SaveIcon"></x:String>
Code language: HTML, XML (xml)These codes (e800, e805, etc.) come from the font itself. You can find these codes in Fontello or in the generated folder, you should have a demo.html file. If you open it, there is a checkbox to display the codes:

By doing this, you will not have to call this ugly code “e800”, but “SettingsIcon” as a StaticResource. A bit more human readable, don’t you think?
<Tab Title="Settings">
    <Tab.Icon>
        <FontImageSource
            FontFamily="fontello"
            Glyph="{StaticResource SettingsIcon}"/>
    </Tab.Icon>
    <ShellContent ContentTemplate="{DataTemplate local:SettingsPage}" />
</Tab>
Code language: HTML, XML (xml)
As you can see, I’m using “fontello” as my FontFamily, but I could use the Alias instead, which is a smarter move. If you have to change the font later on, it will be only one change instead of having to change it everywhere.
And here you could have used Glyph=”” instead of “SettingsIcon”. You’re such a machine! 😉
Happy coding!